

GraphQL Actions
In this guide, we'll explore the new GraphQL action experience. By following this, users using your created actions won't need to write GraphQL code and you, the builder, won't need to create an argument for each field.
Example Actions
Linear > List Teams
Shopify > List Orders (Beta)
How to create new actions?
Request Tab
Create a new action and set the endpoint to the GraphQL one of the app you're building

Properties Tab
In the properties tab, toggle
Is GraphQL?andPagination Limit and Offsetto true

Set the Record Root to where we can find the data for that object you're selecting.
For example, if you are creating a List Orders action and this is the beginning of your query:
query () {
  orders() {
    pageInfo {
      hasNextPage
      endCursor
    }
    nodes {
      id
      legacyResourceId
      name
      createdAt
You should the Record Root value to orders.nodes. This will be used to extract the fields to show in the UI.
Set the Query Action to another action in your app that is a blank query route, it should have a
queryargument and the endpoint should be the GraphQL one of your app.
Arguments tab
Create a query argument, data type should be string and hidden
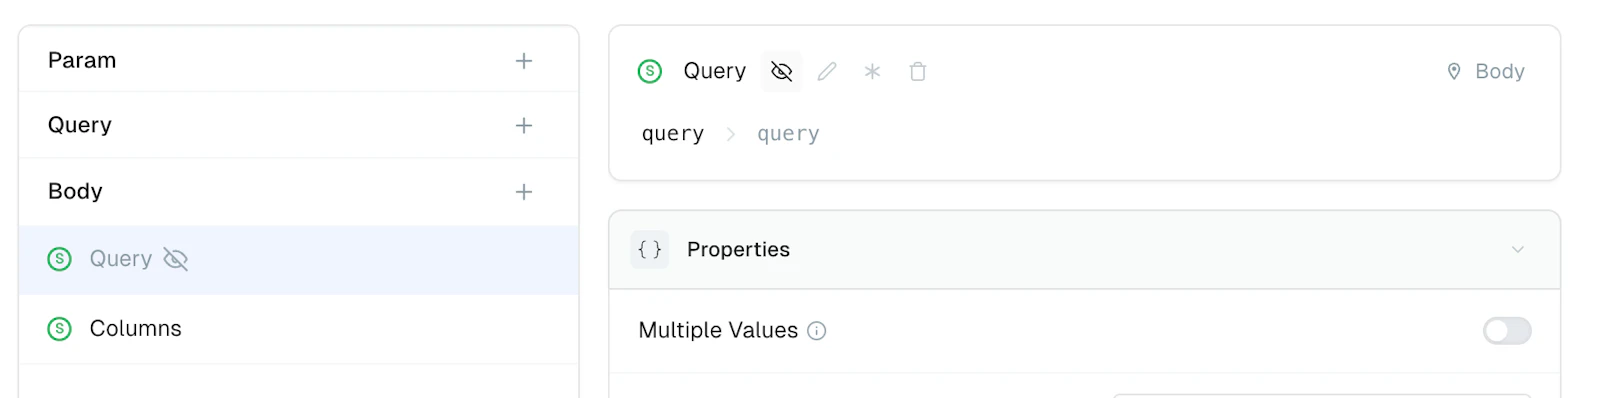
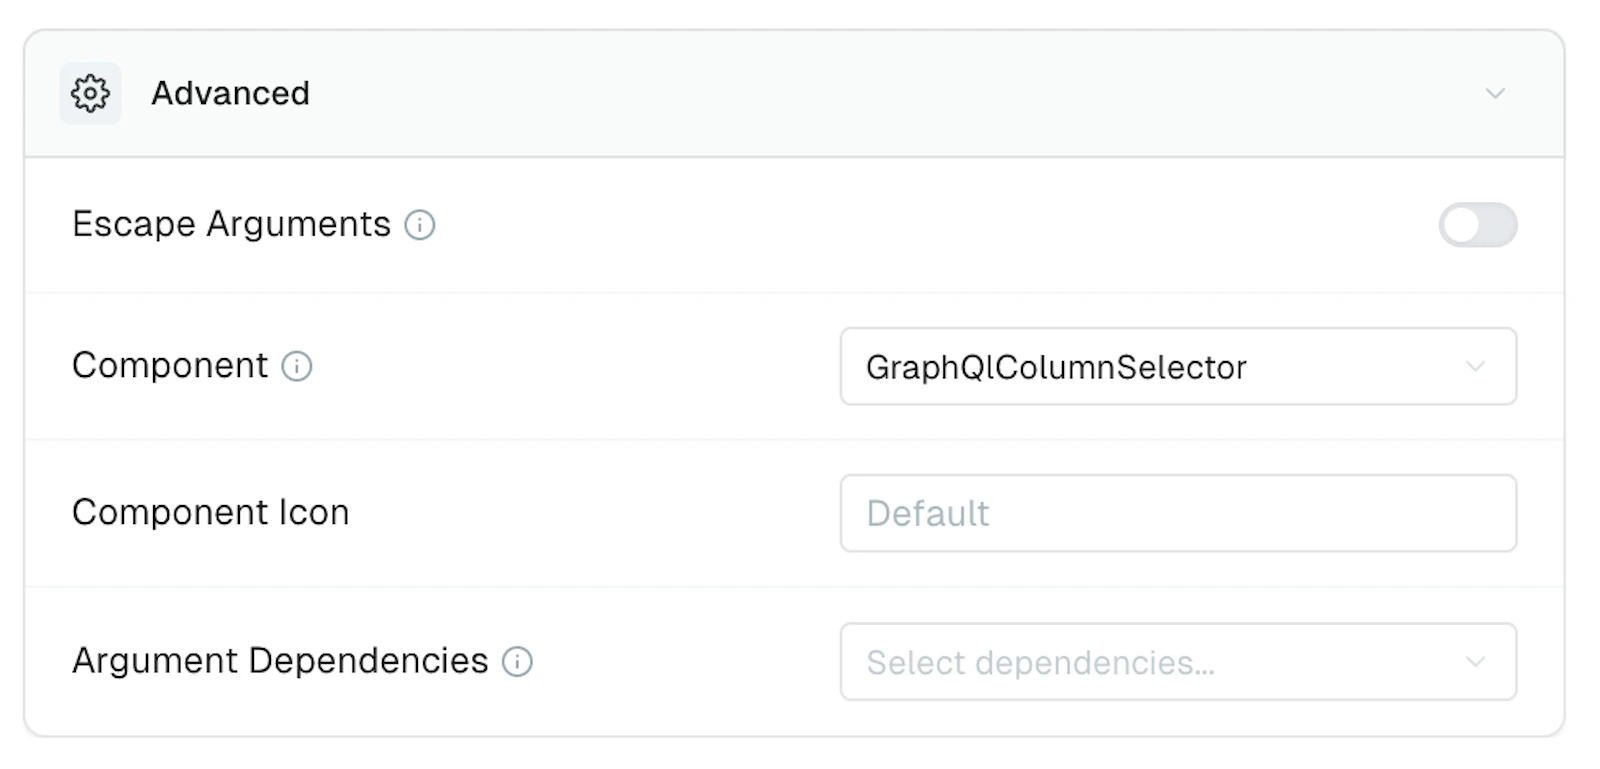
Create a columns argument, data type should be string and set the component in the Advanced section to GraphQlColumnSelector
App-level Configuration
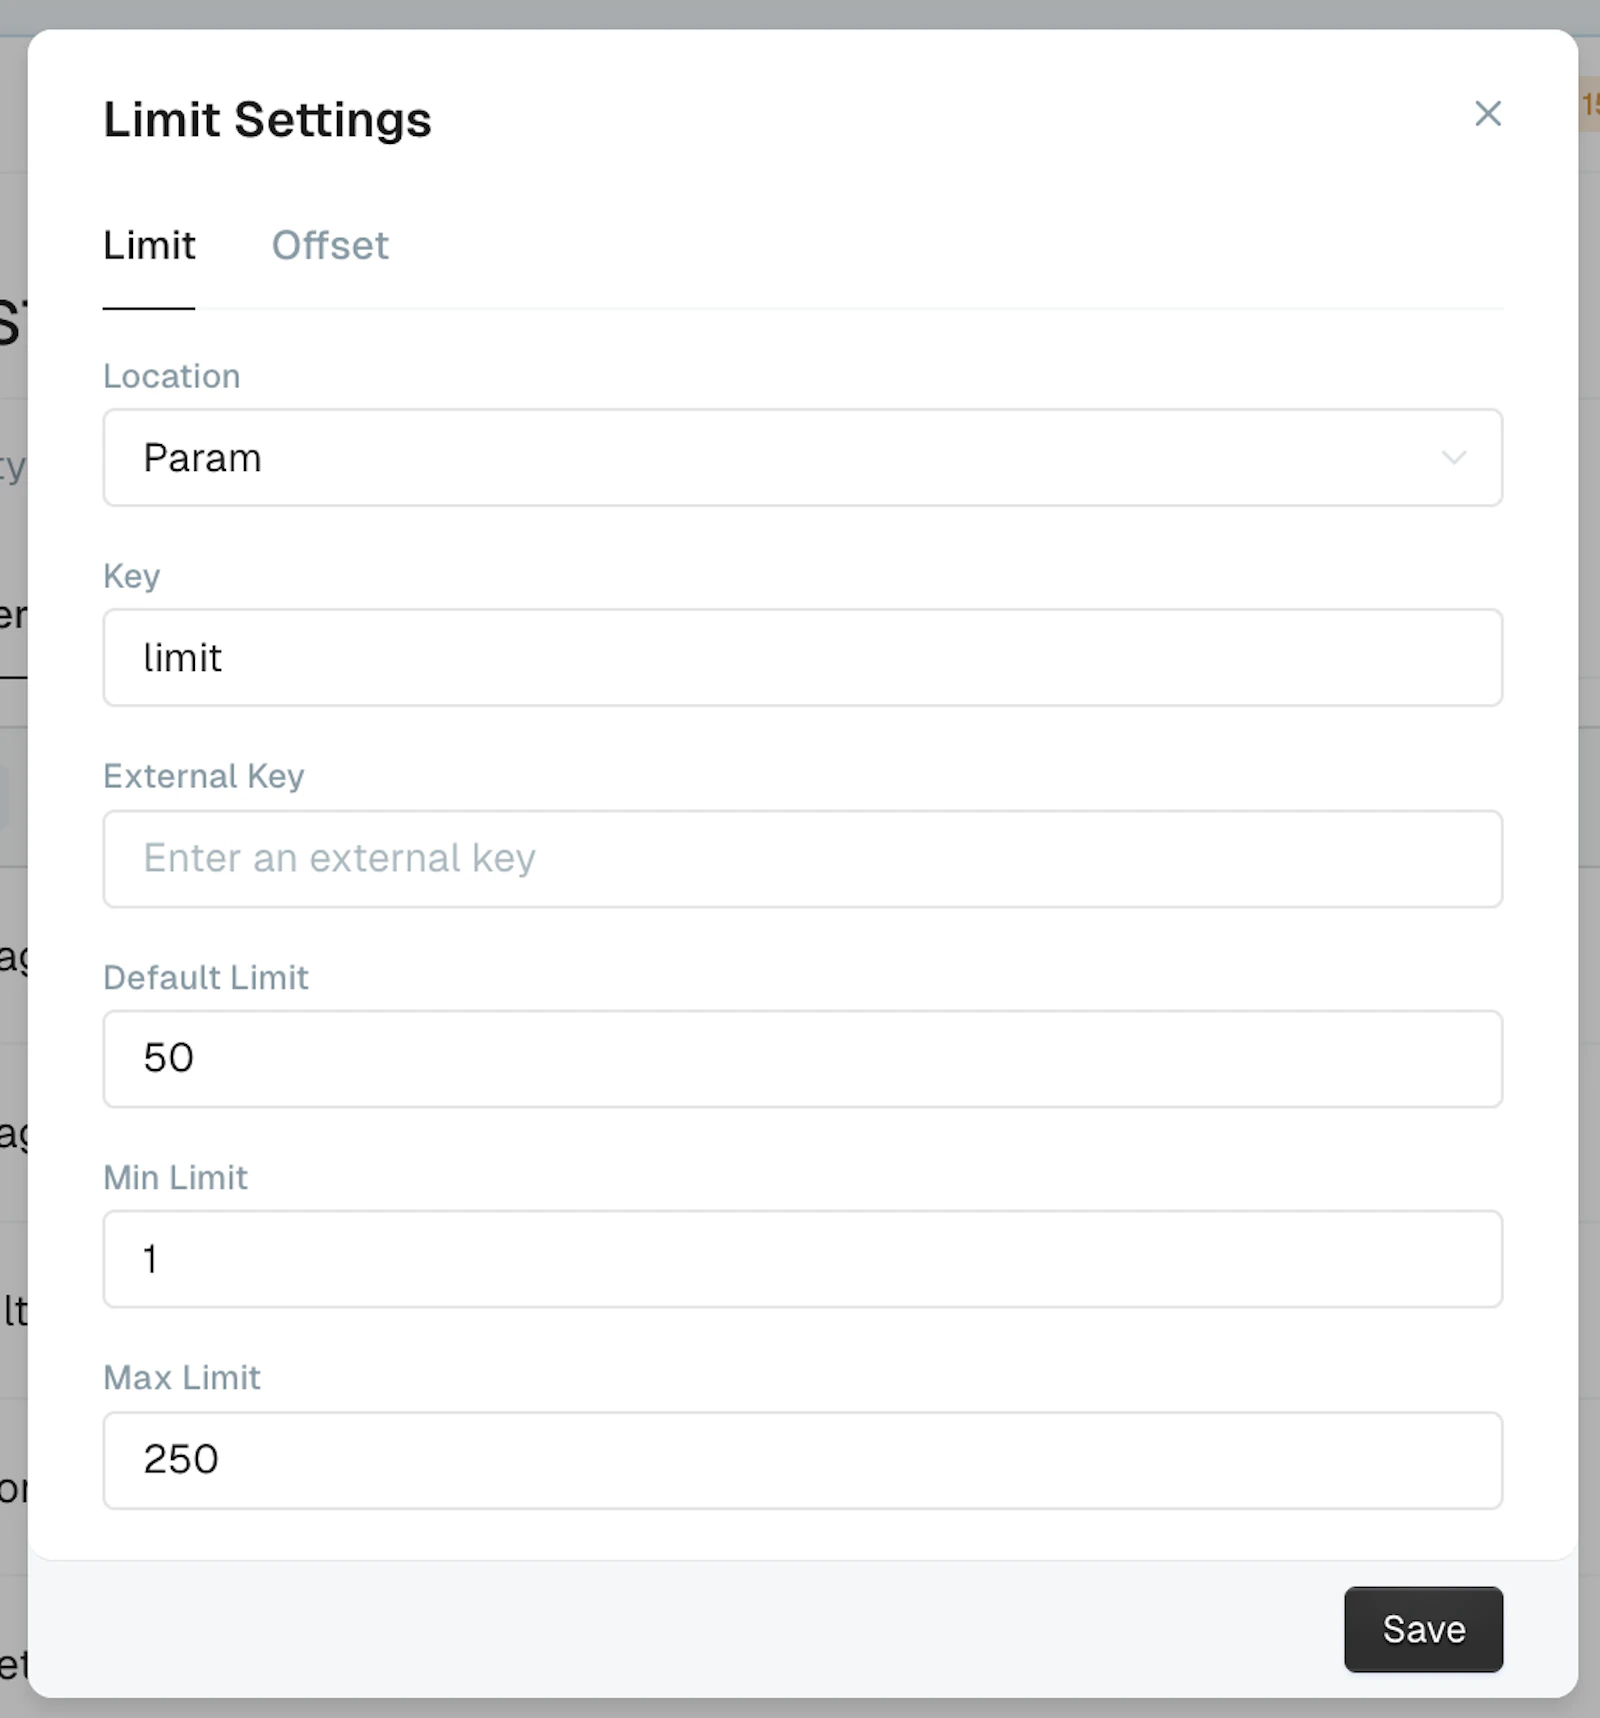
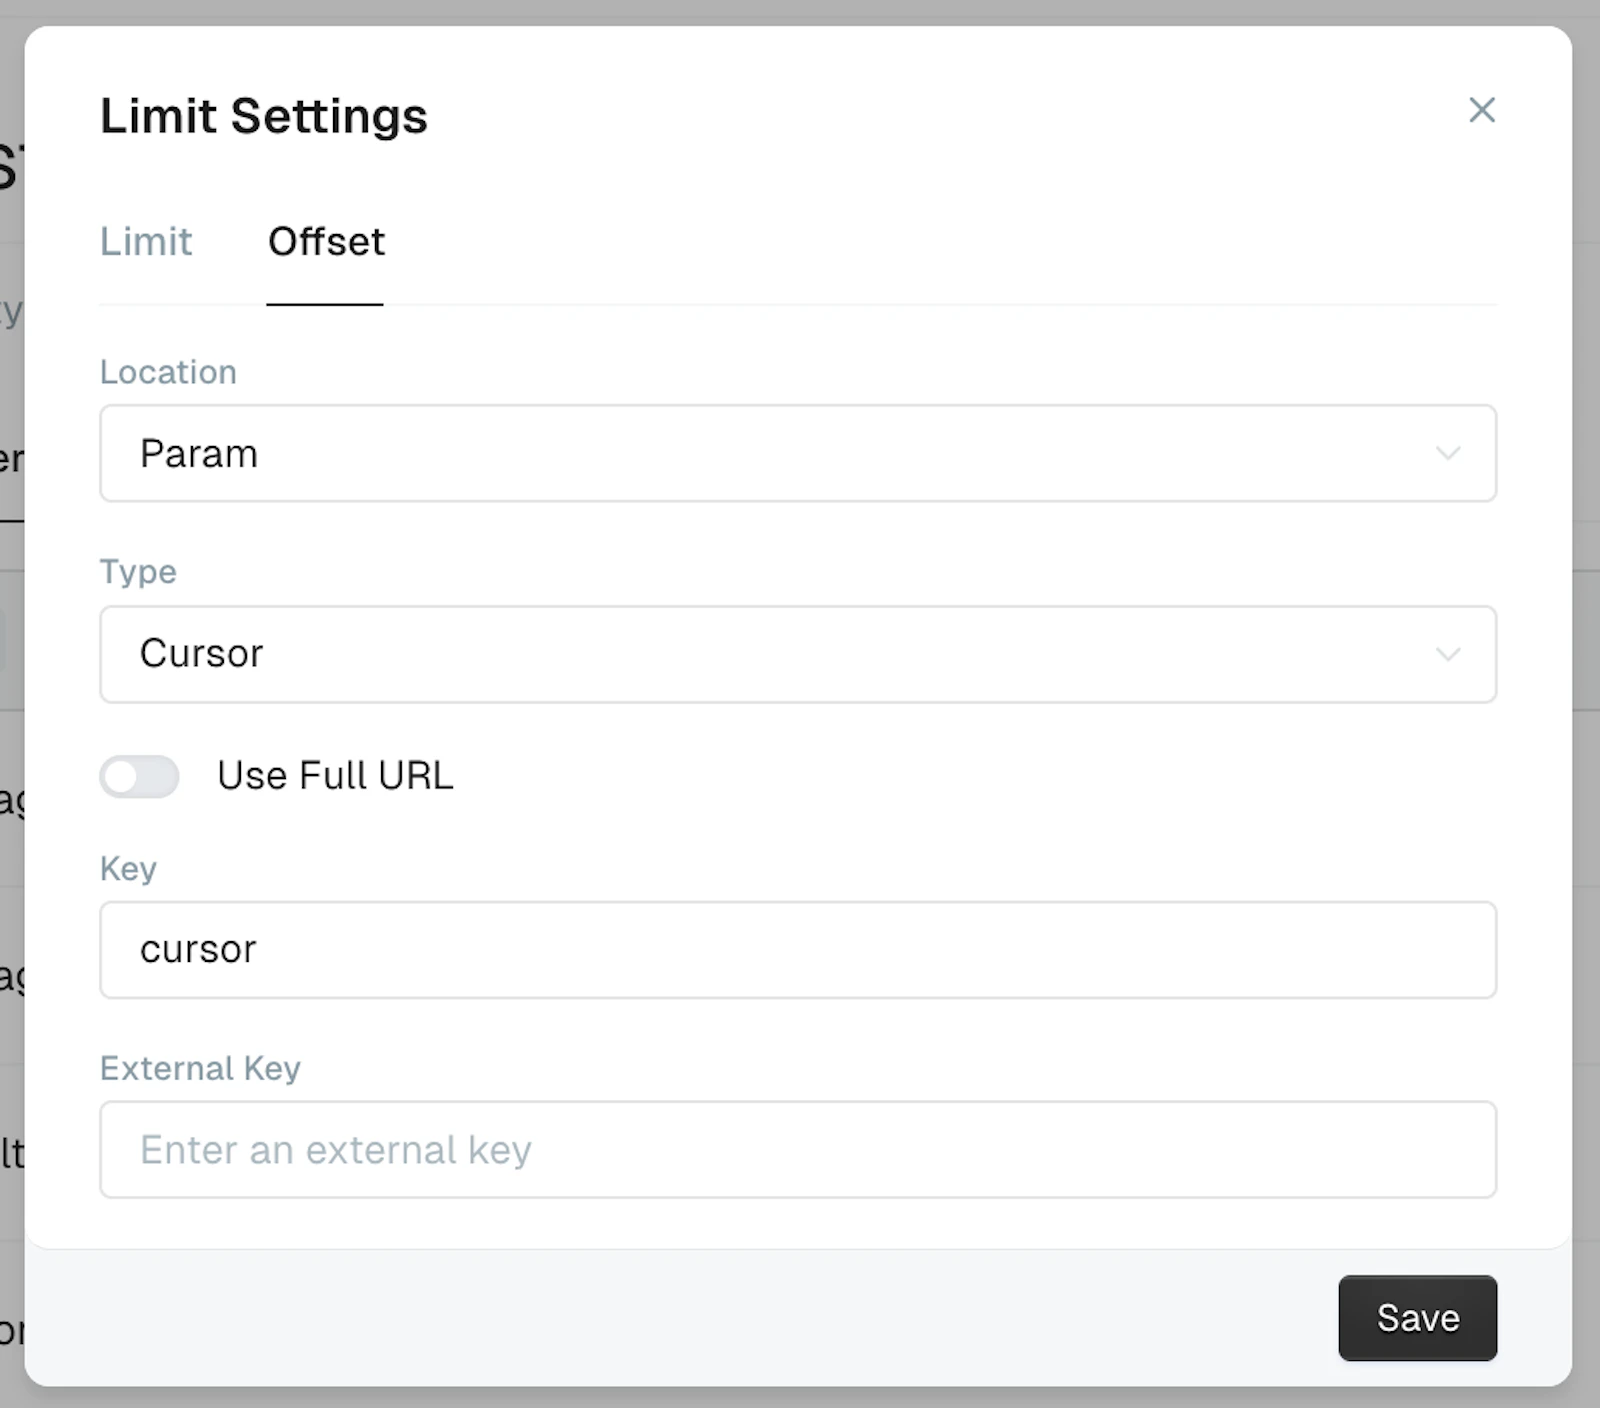
Enable Pagination Limit and Offset and set it to these values
Configure Response Mapper following Linear's example for:
Error Detection
Data Extraction
Code